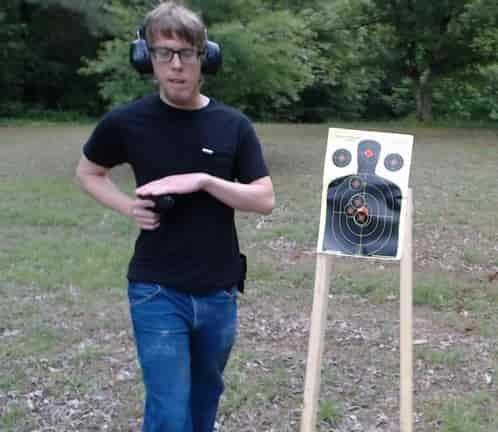
Owning a car does not make someone a good driver. Likewise, carrying a pistol doesn’t make someone good at self-defense shooting.
These shooting drills will improve your shooting and give you the right muscle memory. Get better shot placement with these 10 shooting drills.
Watch the Video to See All 10 Pistol Drills
Draw, Aim, Fire
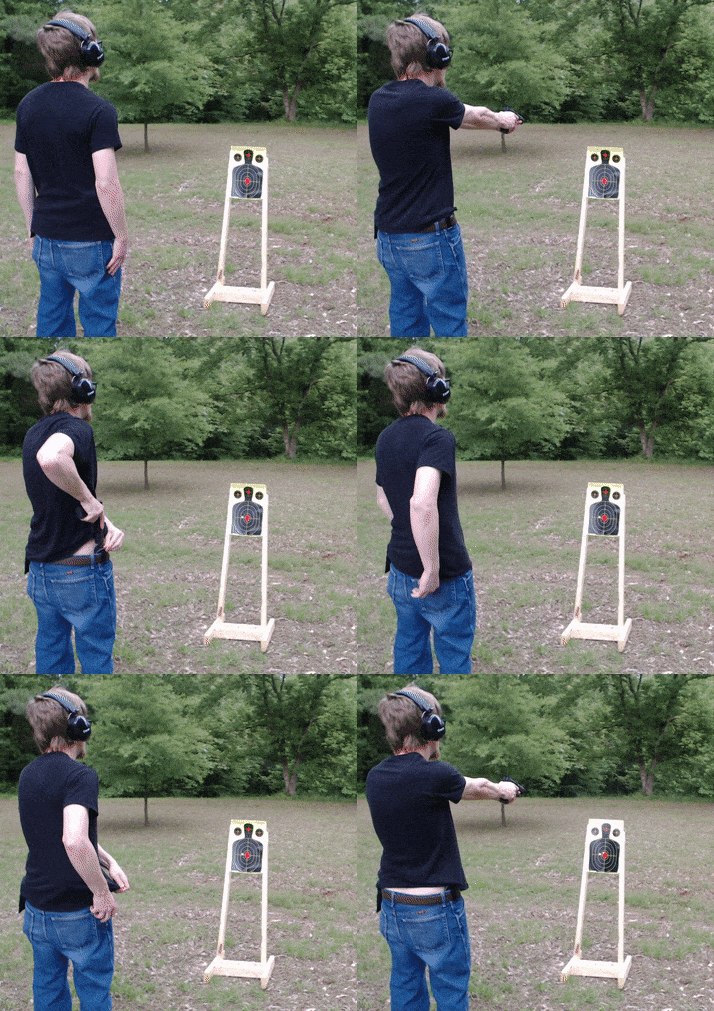
This is the most important shooting self-defense shooting drill. When seconds count, you must be able to quickly remove your pistol from it’s holster and put rounds on target.
Start off slow and to get good form. You want to have the right muscle memory. Increase your speed when your shot placement is consistently good.
Practice shooting a silhouette target 5, 20, and 40 feet away to be prepared for different engagement distances.
Also, holster and draw your pistol like you would when you carry in public. If you carry inside the waist band, then holster and draw inside the waistband. I no holster pocket carry a Kahr PM40, and I practice drawing and shooting it from my front right jean pocket.
A torso silhouette provides the most realistic shooting target. I don’t recommend shooting round targets because threats don’t look like perfect circles.
Shooting From the Hip
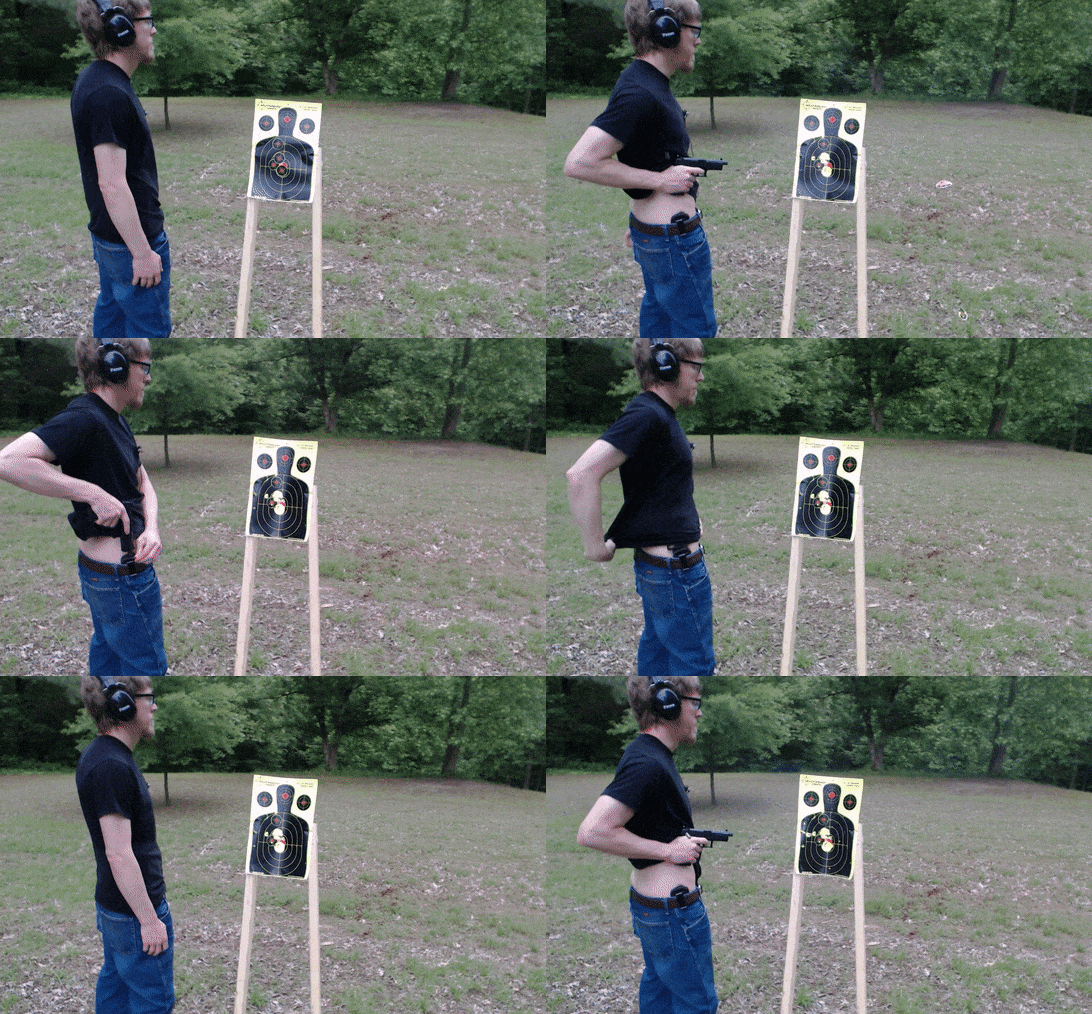
Sometimes bad guys are close. REAL CLOSE. So close that raising and aiming a pistol could let Mr. Bad Guy grab your gun.
Shooting from the hip stops this.
Do two things to safely shoot from the hip. After drawing, place your thumb on or between and in the middle of your side ribs. This will put space between your body and pistol side. Doing this will prevent injury and your shirt from getting caught in the slide and causing a jam.
At the same time as placing your thumb, place the magazine well just like your thumb. This will insure the muzzle is not pointed at you in anyway.
A laser sight will increase your accuracy. However, shooting from the hip with a laser requires practice. Lasers don’t make a pistol on auto-aiming video game gun. Also, some lasers have to be manually turned on. Turning on these types of laser sights needs to become muscle memory with practice. There are lasers that automatically turn on such as lasers from LaserMax with GripSense. Lastly, red lasers are easier to see in low light than green lasers. In bright conditions, green lasers are easier to see than red lasers. Before purchasing a laser sight, think about how much light will be around you during the most likely times you might need to defend yourself at very closes distances.
Moving and Shooting
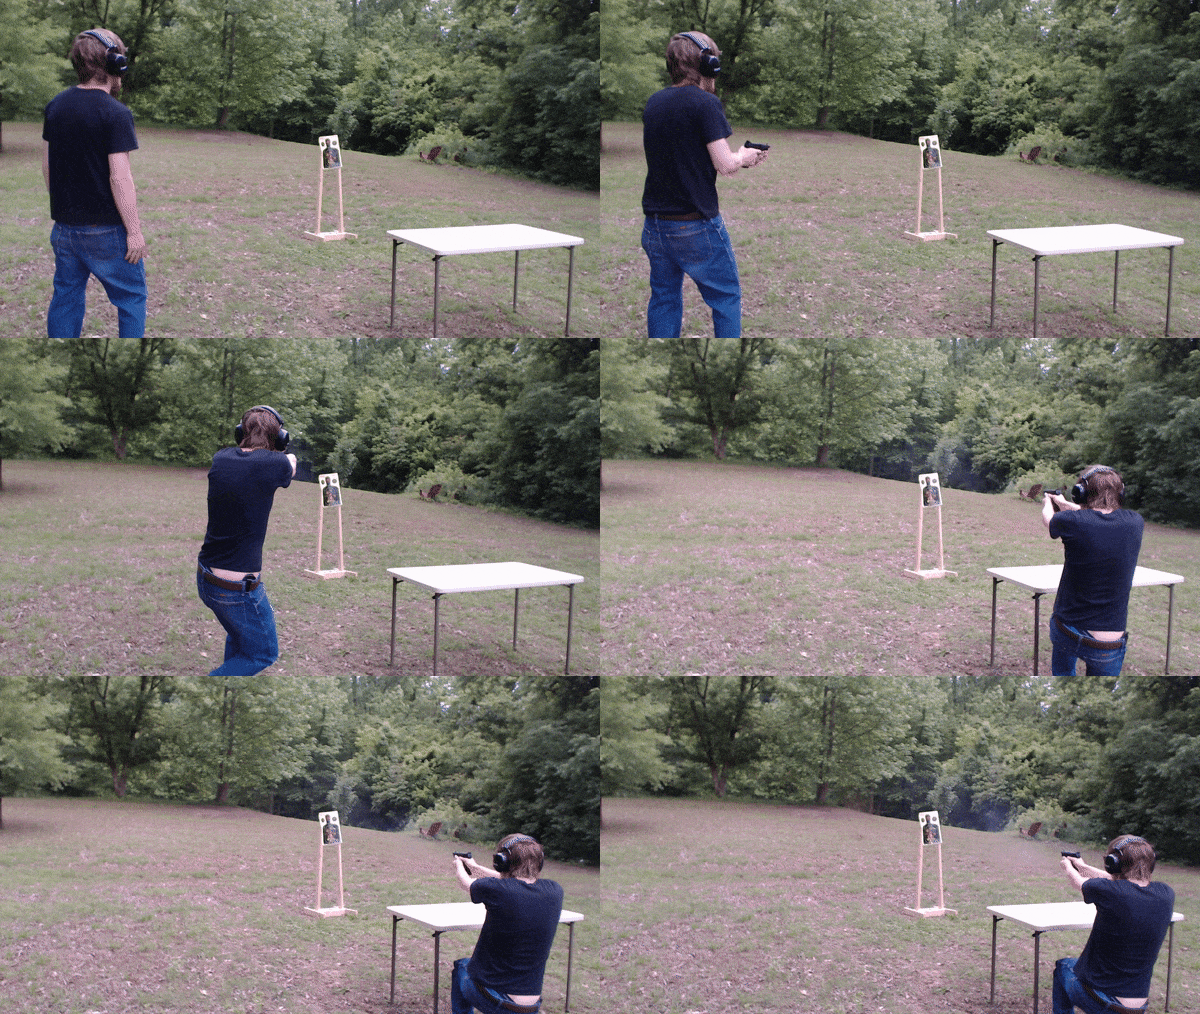
Moving and putting rounds on target is the best way to stay alive in a gunfight. Mr. Thug is probably bad at shooting a moving target. Give him a moving and shooting target to make yourself a hard target and ruin his day. Moving to cover is even better. Behind the engine bay of a vehicle is good cover. Bullets especially pistol bullets have a very hard time going through engine blocks. Brick and cinder block are also good at stopping bullets.
While your legs are moving, swivel at the waist. Think of shooting like a tank turret from the waist up. When we normally walk, we bounce above the waist. You should move your legs to keep your upper body smooth. Avoid crab walking and any other unnatural leg movement. You won’t do them in the heat of a gunfight.
You can practice moving and shooting with a target and table. After you start shooting, move and maintain fire on the target. Once you are at the table, take a knee and keep shooting. Practice different movement directions by changing your starting point.
Double Tap Drill
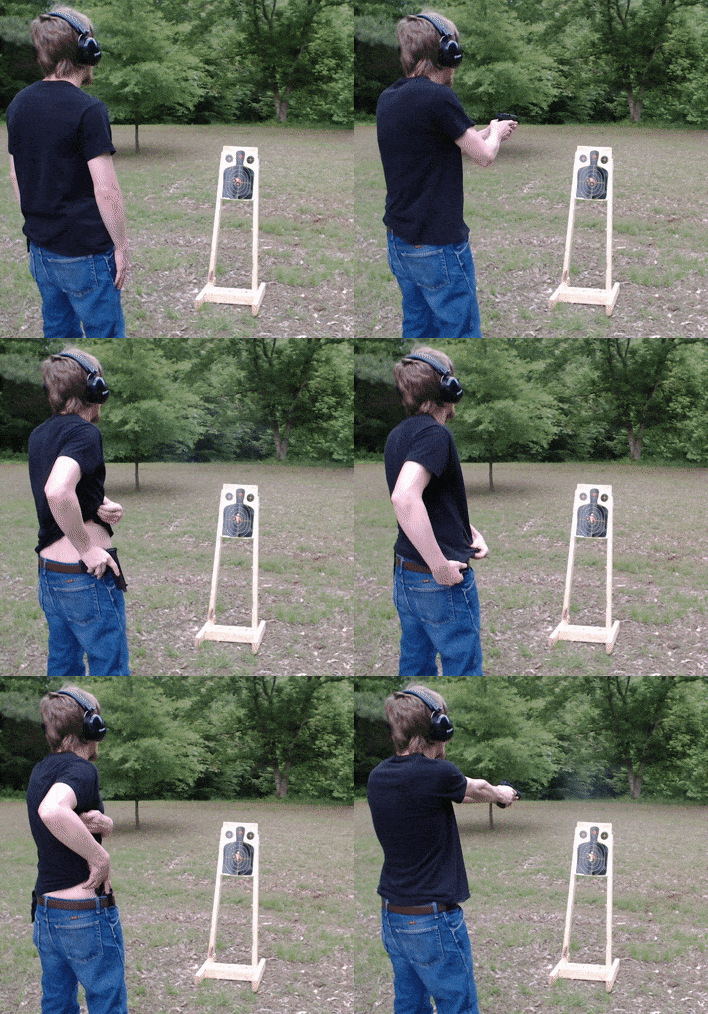
Pistol bullets do not carry much energy. They need to hit vital organs or nerve tissues to stop Mr. Bad Guy. It is very difficult to get good shot placement when a defender and attacker are both moving.
Because of this, practice the double tap drill to get the habit of taking multiple shots at torso targets.
Shooting Multiple Targets
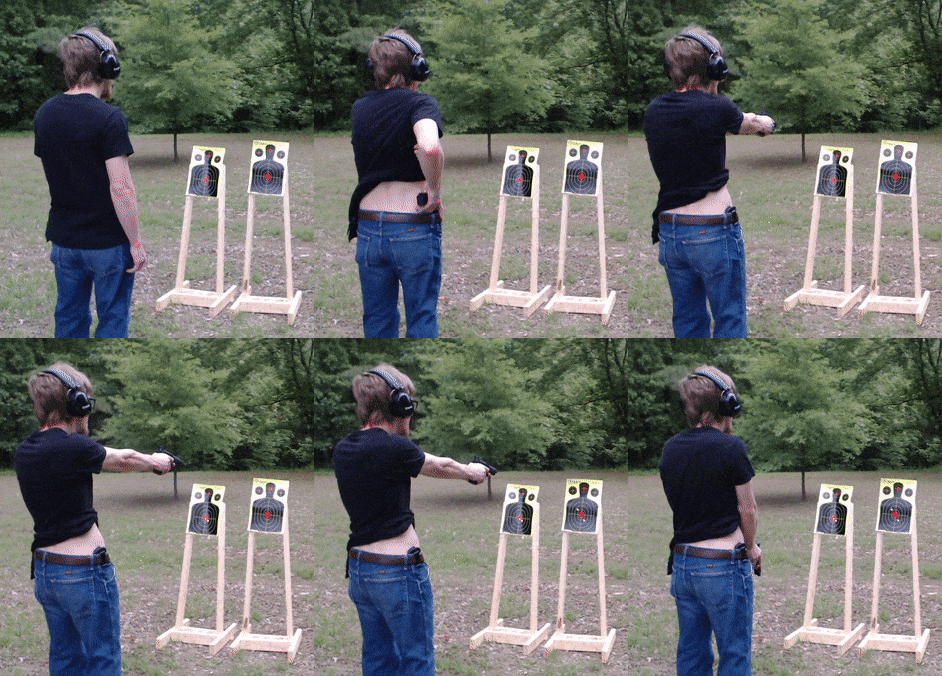
Sometimes violent criminals work together. Practicing the drills above with multiple targets will prepare you for bad guy teamwork.
The Tactical Reload
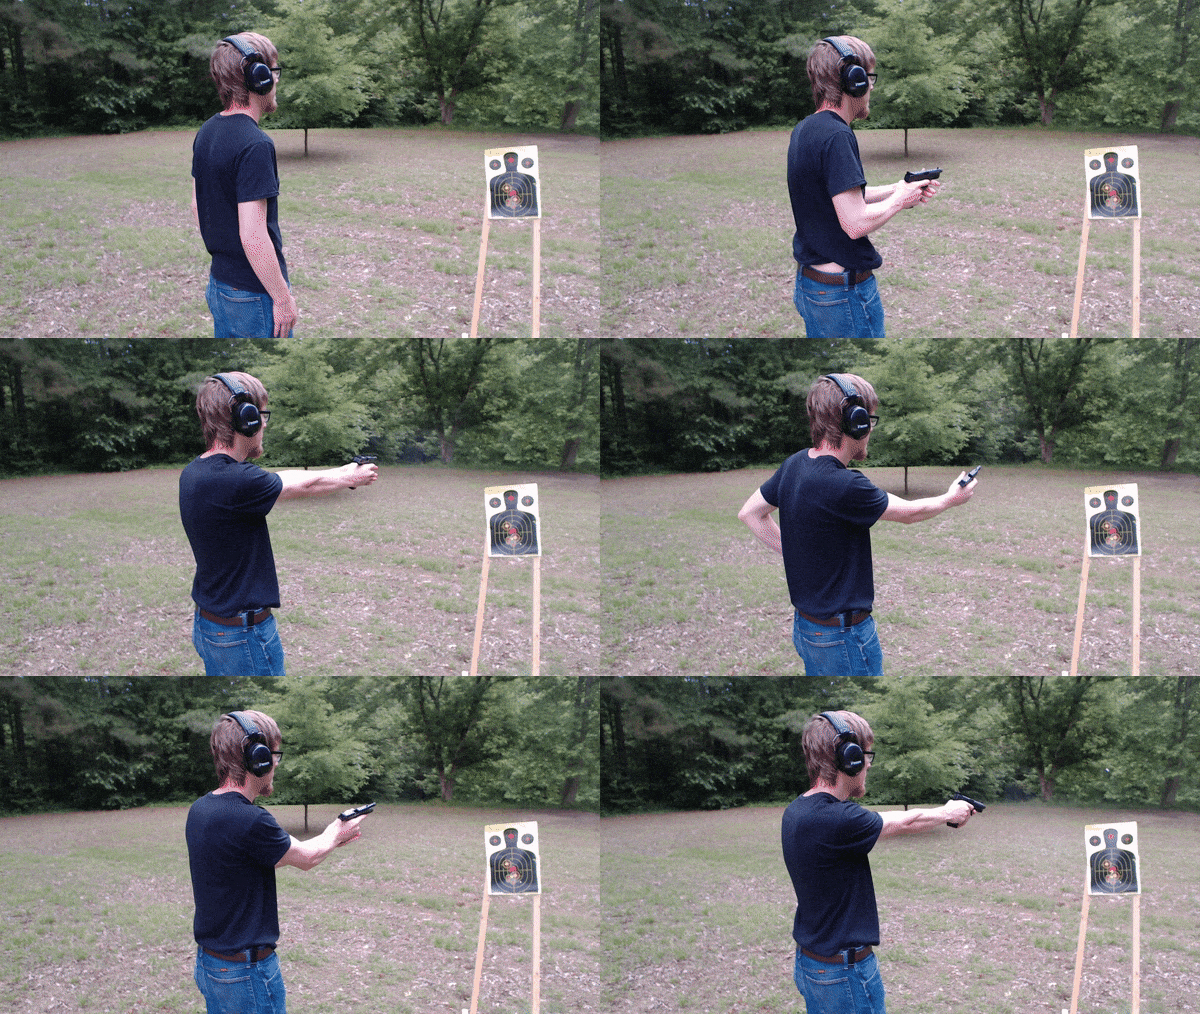
If multiple threats need to be neutralized, then reloading might be needed. This is especially true for you if you are in a state with a 10 round magazine capacity limitation. To my knowledge, no state currently puts a limit on the number of magazines their citizens can carry.
The tactical reload drill will increase the muscle memory needed to quickly resupply your pistol when you need it the most.
To get the most for your shooting time, use the technique. With an empty chamber, load one magazine with one round and load another magazine to full capacity. Put the magazine with one round in the pistol, then rack the slide to load it. Place the handgun in your holster, then draw aim, fire, and reload, and fire again. Now, remove the magazine and place the empty magazine in. You have one in the chamber to repeat the drill. To save even more time, have a friend load a 3rd magazine as you do the drill.
The Wall Drill
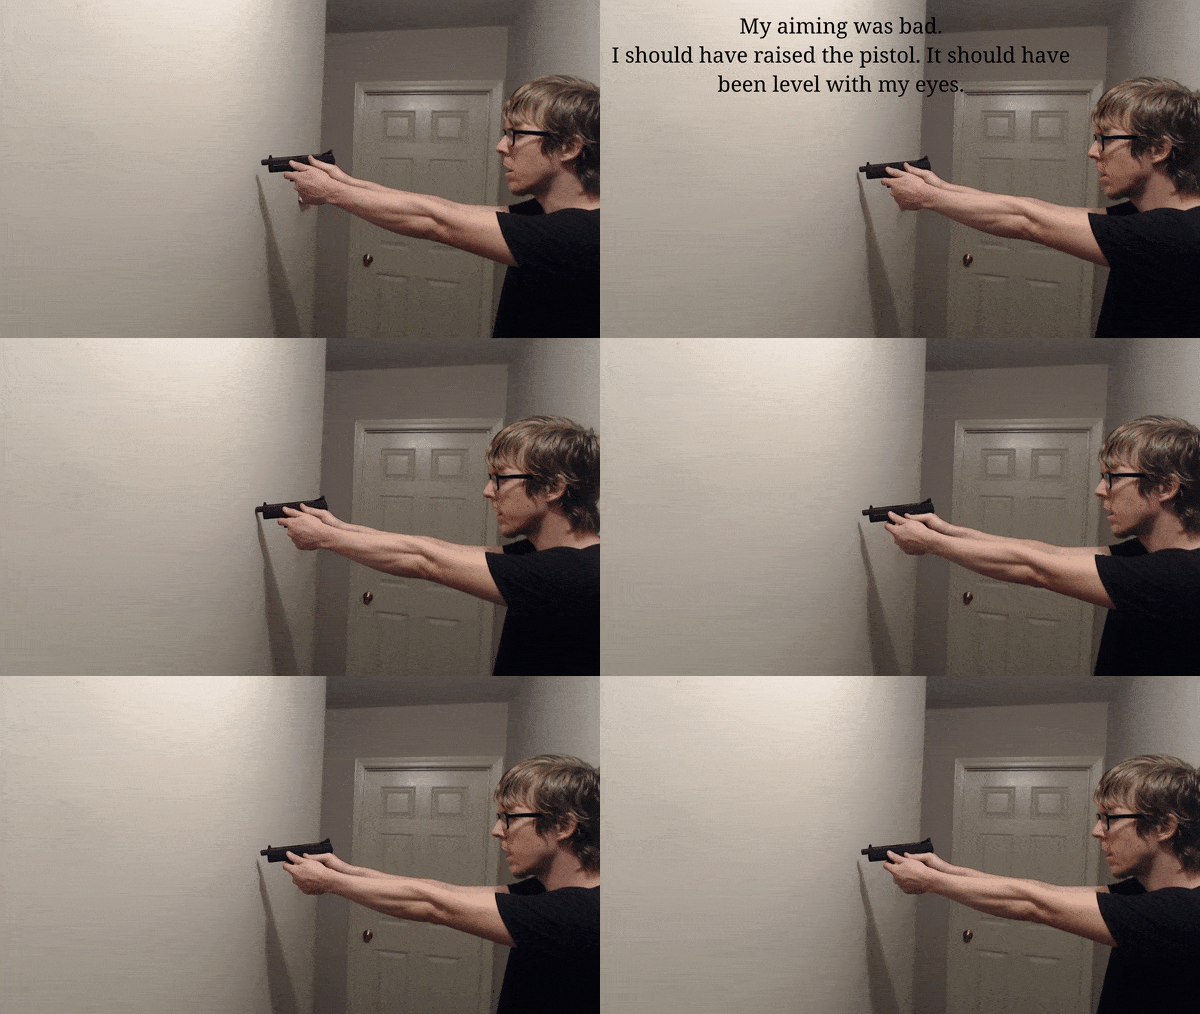
A great drill you can do at home without ammunition.
Keep the magazine out of the grip. You don’t need it. Rack the slide to remove any rounds from the chamber. Use a chamber check flag show yourself and others the chamber is clear.
Aim your pistol at the wall. The muzzle should be almost touching the wall. Look at the front sight through the rear sight. Squeeze the trigger smoothly to avoid moving the sights off each other. You will likely see up and down or left and right front sight movement as you pull the trigger. Practice this drill stop moving the muzzle while pulling the trigger.
The second part of this drill focuses on a smooth trigger release. Rack the slide with the trigger fully pressed. Then look at the front sight through the rear sight. Release the trigger smoothly until it resets. You will likely see movement like you did when pulling the trigger.
Drawing and Aiming in a Vehicle
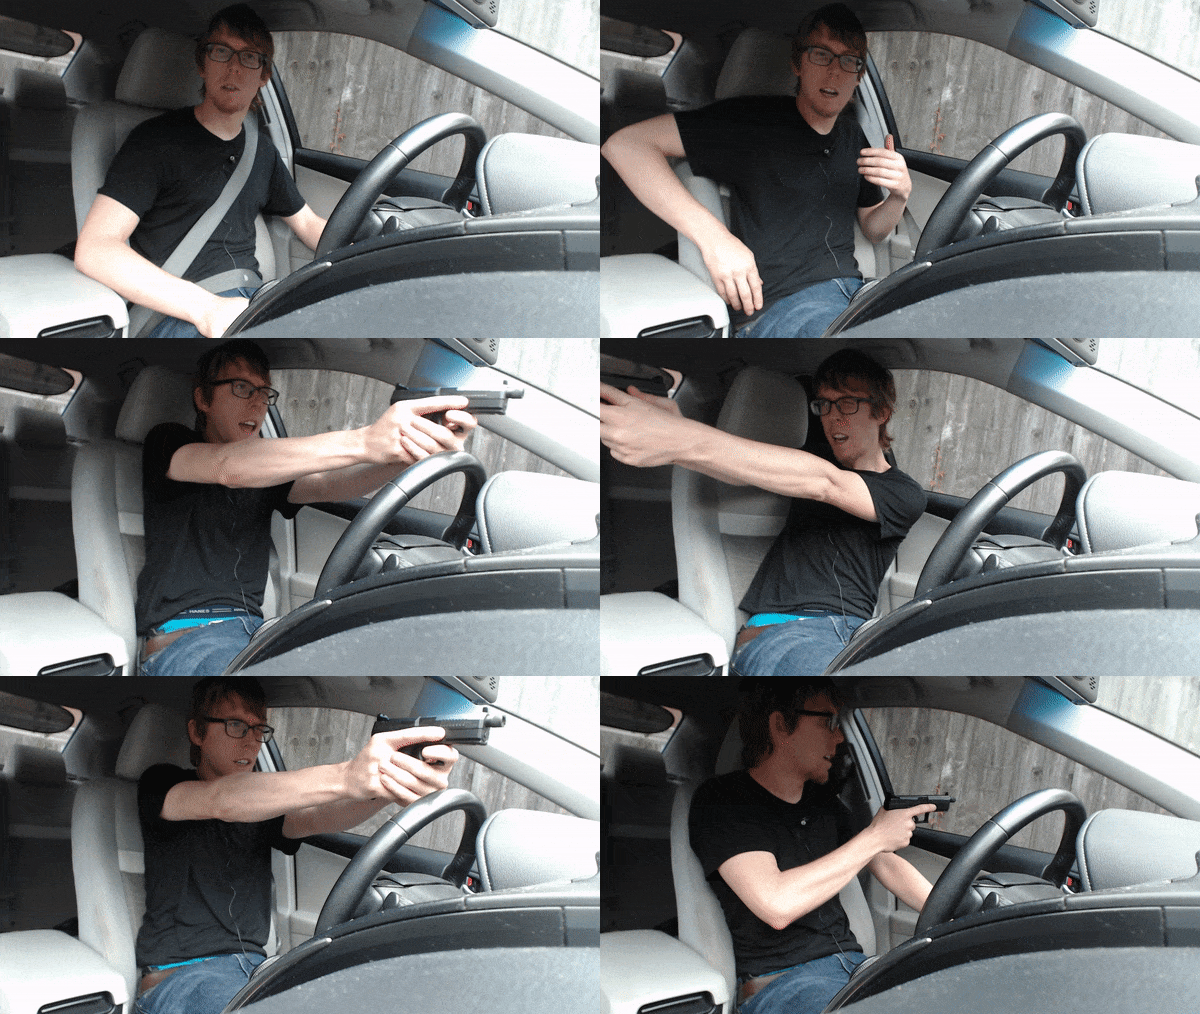
One place few people talk about shooting for defense is in a vehicle. However unlikely, it is possible you might need to defend yourself and loved ones from someone outside your vehicle while you are in the vehicle. Drive-thru ATMs, intersections, and parking lots are possible attack zones.
Drawing while sitting in the driver’s seat is awkward and difficult. There is the center console to the right. The steering wheel and waist belt will slow down an appendix carry drawn. For right handed shooters, there needs to be space between their holster and the center console to grab and draw. Even more of an obstacle is seat belt bucket. It holds the seat belt tongue tightly over a right side iwd or owb holster. Left handed shooters still have the waist part of the belt over their iwd or owb holster. Leftys also have to figure out how to aim out of the driver side door window. The door is so close the left side of the driver that getting the pistol eye level and aiming is difficult.
Practice this drill by quickly pushing the seat belt release button and throwing it to the left side with your weak hand. For left handed shooters use your right hand. For right handed shooters use your left hand.
Drawing and and aiming from the driver side is must. Also, practice from different passenger seats.
When the seat belt is out of the way, practice drawing and aim out of the driver side window and front window. You probably should not take practice shots even with the driver’s side window down. Only do this if you know nobody is in that general direction for several miles.
Since you won’t be shooting, don’t have a magazine in, rack the slide, and put a chamber flag in for extra peace of mind.
Low Light Shooting
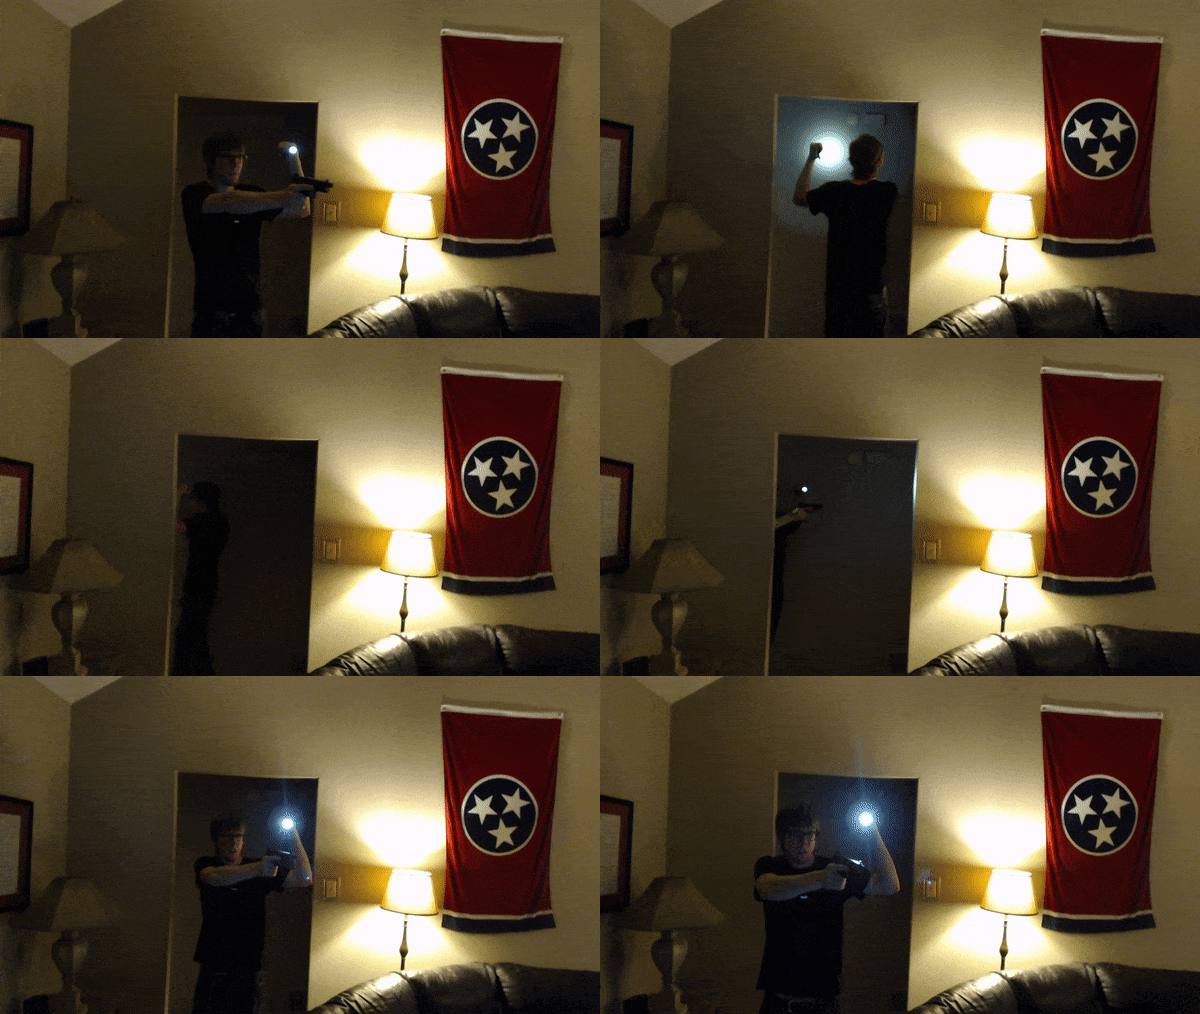
Violent crimes often happen at night. Practice the drills above at night with a light to be ready day or night.
Pistols will accessories rails under the barrel are very common now. Maybe you have one, but think twice before putting a light on your pistol.
A light attached to your pistol will blinding your target. This makes it the likely aim point for Mr. Bad Guy. He will be aiming right at your face. If his shots are low, then your neck and chest will be hit. This makes weapon mounted lights a questionable choice for everyday carry. Use the FBI method of putting shining a light on a target with detached flashlight.
The FBI method of shooting with a light avoids the problem of giving an attacker a good place to shoot at. It involves shooting with your strong hand and pointing a flashlight with your weak hand at the attacker’s face. There is a HUGE benefit using two hands like this. The hand holding the light can shine the light away from the body. This makes the attacker’s aim point the light and the arm holding it. Keep the aim holding the light in an L Shape. This way you can walk and shine your light through narrow doorways.
A word to warning, shooting in low light will making seeing behind your target more difficult. Safe shooting always requires seeing not just the target, but where bullets might travel around the target. Many of the bullets shot by trained police miss their targets. In 2016, LAPD1 police hit with 48% of bullets fired.
Use a light that throws enough light around your target to see around and behind your target.
Failure to Fire Drill
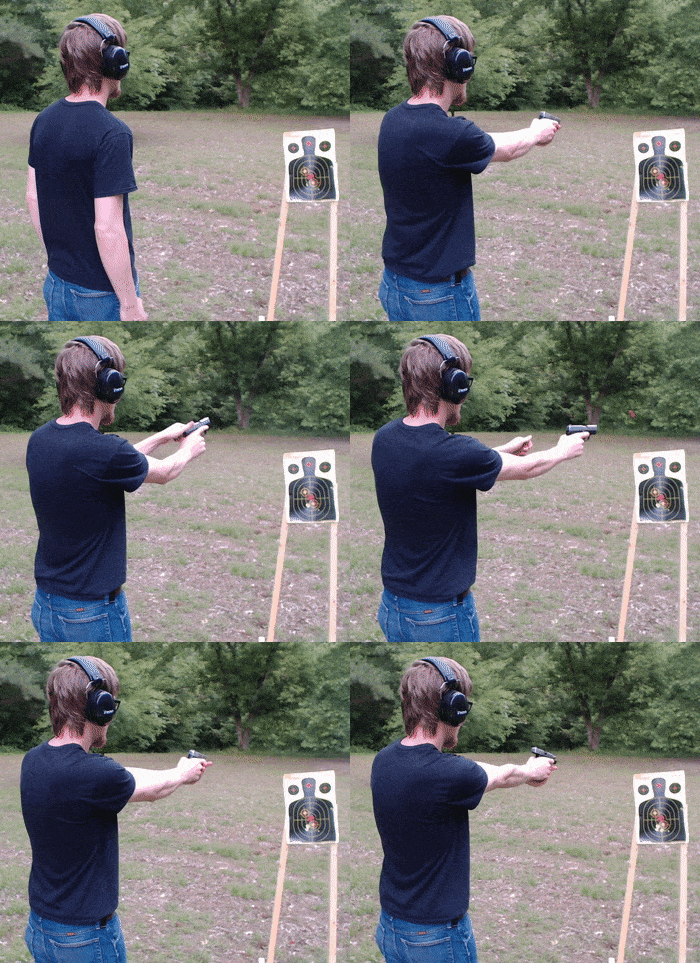
Have a friend randomly load a few Snap Caps along with live rounds. Causing a failure to fire with snap caps has two practice benefits.
You will get to practice the tap and rack drill. The tap rack drill will clear the unfired round(Snap Cap). This drill requires tapping the bottom of the magazine to insure the magazine is fully inserted and it will feed ammunition reliably. This “tap” is not light. It should be a hard slam on your palm that’s not holding the pistol. Then rack the slide hard and fast to remove the unfired bullet.
A failure to fire can expose a pre-fire flinching problem. Recoil stops the shooter from being able to notice the flinch. Flinching occurs because a shooting is anticipating the recoil and sound from gun they are shooting. This flinching just before a pistol fires will reduce accuracy because the front and rear sights alignment will move off the target. Accurate shooting requires squeezing the trigger while keeping the front and rear sights aligned on target. Often good shooters will flinch during rapid fire even if they don’t flinch when taking slow, accuracy focused shots. Practice the Snap Drill in both rapid fire and slow fire to identify a flinching problem.
The stop flinching requires noticing it from a failure to fire and intentionally stopping it and developing a habit of not doing it.
Increasing hearing protection might also reduce flinching. Use earplugs and earmuffs together for maximum noise reduction.